Hi,
I have a a MIRO account.
We are 5 temmembers.
I am confused, wo can see which boards?
I want, that ONLY ME can see my boards.
But it looks like that others can also see my boards.
I have absolutely no control.
If I go to dashboard I can also see the borads of others. Or these are our common boards.
Please tell me how I can see or have control who could have access.
When I am in one board, I can only see who is in the moment in the board, but not who has access.
https://miro.com/app/dashboard/
thanks

Answered
control about boards, Who can see them?
Best answer by Robert Johnson
While I wait for you to answer, check out the Projects Help Center article - it explains the Teams → Projects → Boards hierarchy.
Here’s some more info (that I will one day put together into one post that explains accounts/teams/members/boards/projects etc.).
Miro Account Profiles
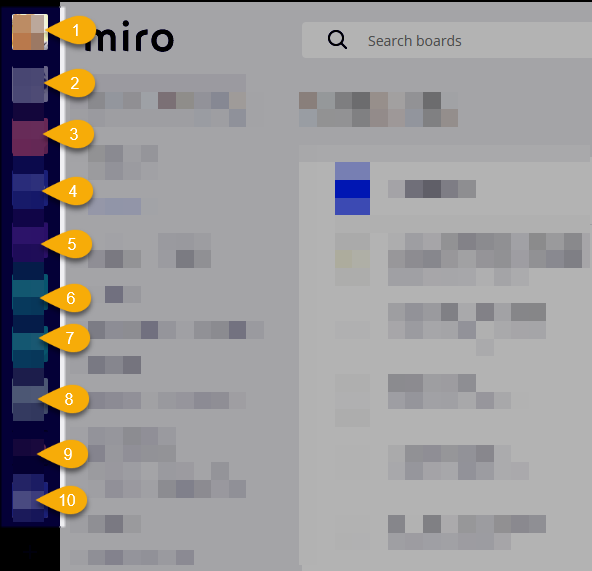
Everyone who creates a Miro account has an account profile (this is unique by email address). That account profile can then be added to an unlimited number of teams. These teams would all show up on the left-hand, vertical bar in the dashboard, e.g., my account profile is a member of ten teams:
Default Board and Project permission settings
I just finished sending this information to someone else. Essentially what you'll want to do in your Team profiling settings is to set the default sharing for newly created Boards and Projects so that only the creator can access them. This is important for a number of reasons, including:
- Only the person creating the board/project can see it and therefore it remains private until it is explicitly shared with someone(s); and
- it avoids "clutter" in people's dashboards (imagine you add, say, 50 students and each of them creates two projects and three boards!
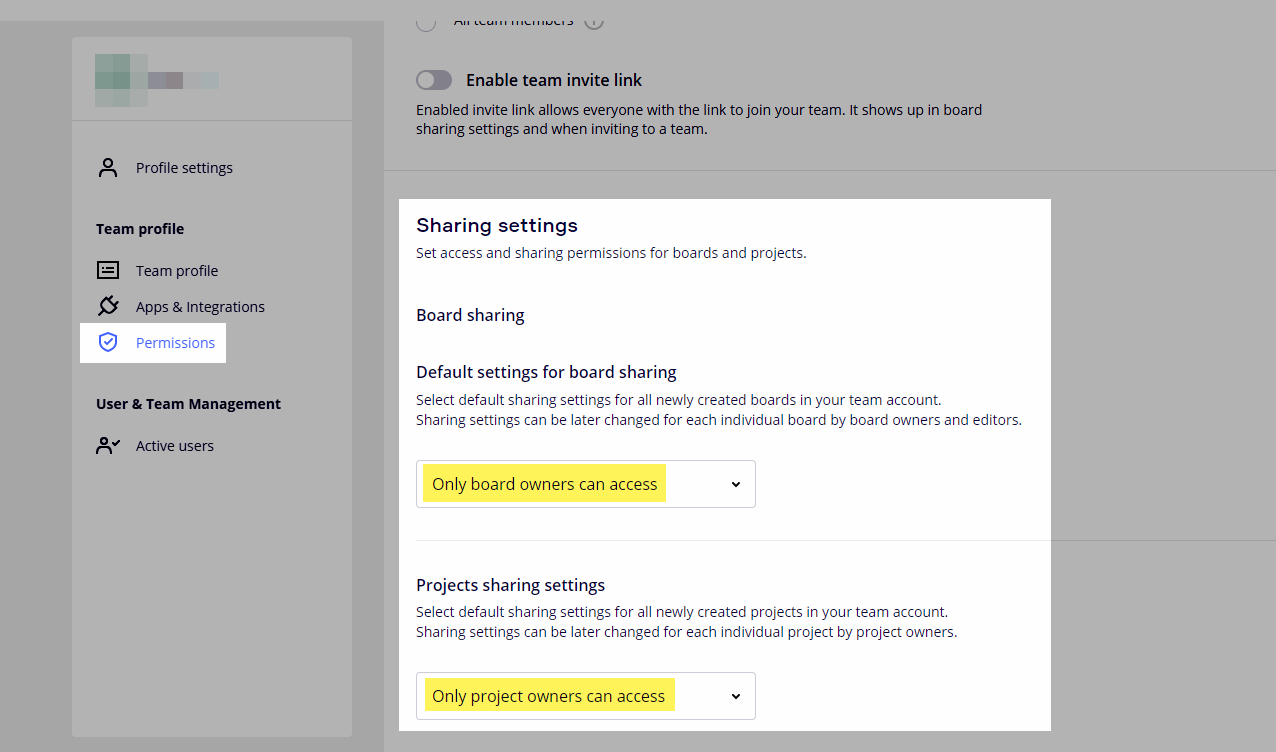
To set this up:
- From your dashboard, click on the team settings gear icon
- Click on Permissions
- Scroll down to Sharing settings
- Set "Default settings for board sharing" and "Project sharing settings" to Only board/project owners can access:
I thought that perhaps Miro may have already changed the default settings to the above, however from what you’re telling me, it doesn’t appear they have.
Projects (and using them like “folders”)
You can set a folder to be visible or hidden to other team members. If hidden, any boards in that project will also be hidden, UNLESS you have either added members to the project OR you have added a member at the board level (more on that later):
Use case:
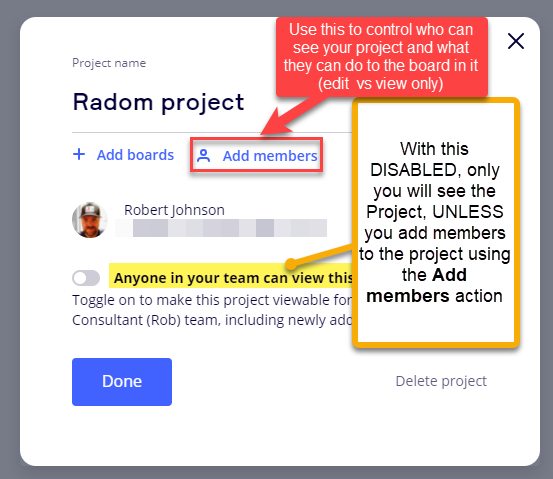
- You need to work on a few boards with Tim and Sally on an initiative called “Marketing team system upgrade”, so you create a project called Marketing team system upgrade
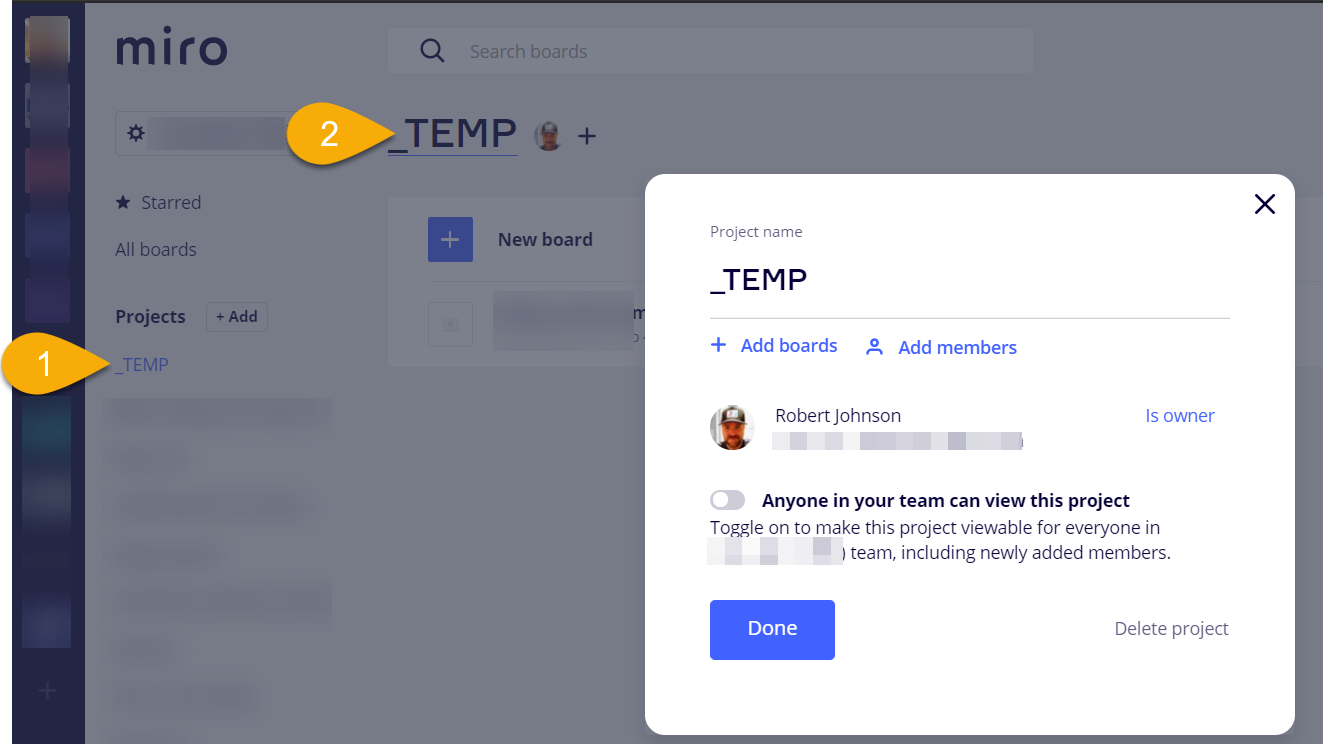
- You then open that project and make use “Anyone in your team can view this project” is DISABLED
- You click on Add members and add Tim and Sally and give them Edit access.
- Now Tim and Sally will see that project in their Miro dashboard and any boards that you add to that project.
- If a new team member needs to work on those boards with you, Tim, and Sally, you just add them to the project and now they can see all of those boards.
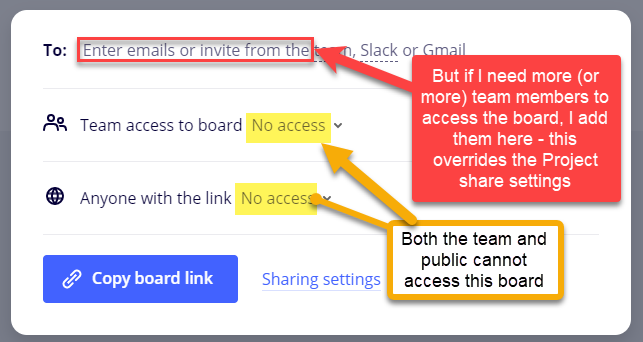
Another use case: You may a project called Achim, set “Anyone in your team can view this project” is DISABLED, and keep your private boards in their. Except there is one board in there that your manger needs to see, so you open that board, select Share, and add your manager here:
Board Sharing permissions
Before I try to answer all of your questions, I will break down the Free Plan roles and types of access to a board in the Free Plan and moving forward I will simply refer to these and Team and Public. You can find these settings in a board’s Share settings from either inside of the board or by using the ellipsis “three-dots” menu:
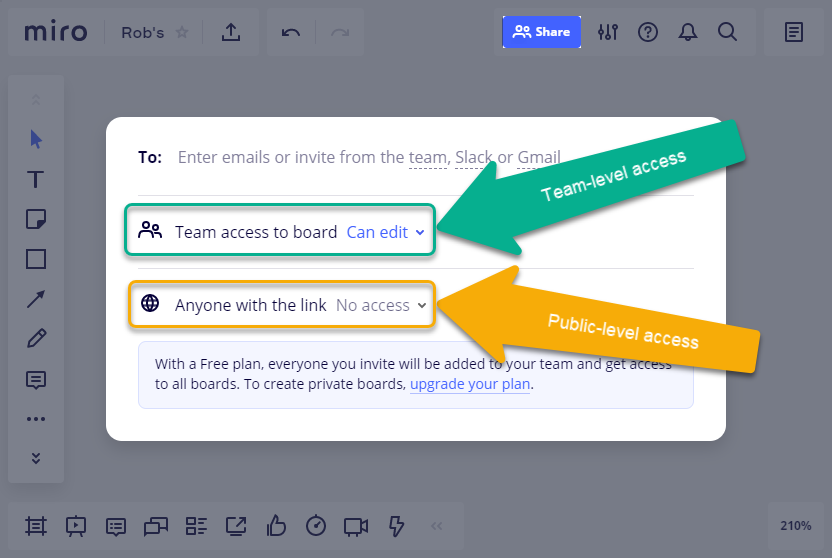
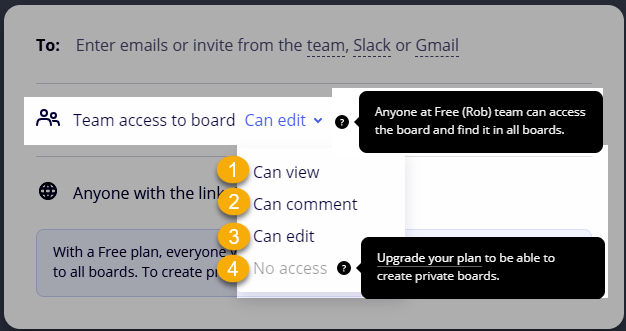
First, let’s talk about the options available at the Team level:
-
Can view - Any member of the Free Plan team (either Team Admin or Member - the only two roles) can view the board in read-only mode - they will not be able to edit it - only the board owner (the person who created the board) will still be able to edit the board.
-
Can comment - Now any team member can view the board, add new comments to objects that did not already have comments, as well as add additional comments to existing comments.
-
Can edit - This is the default setting of newly created boards in a Free Plan.
-
No access - aka, Private Boards ← as this Miro Help Center article states, and as does the help bubble in the above screenshot, private boards are not allowed in the Free Plan.
Public board access:

NOTE: “Anyone” really means anyone - they don’t even need to have a Miro account:
-
Can view - Again, anyone with the link can only view the board.
-
Can comment - Similar to the Team-level setting, anyone with the link can create & add new comments.
-
Can edit - This option is not available for Free Plans. Only team members can edit the board. Public edit access to a Miro board is for paid plans only. This feature is commonly referred to as Guest Editor access - check out this article → Collaboration with Anonymous Guest Editors. It is also worth noting that paid plans can also password protect public boards.
No access - This is the default setting and as it sounds means there is no public access allowed to the board.
Keep your questions coming!
This topic has been closed for replies.

Make your 2026 football predictions with Miro + enter to win $400!

Enter your E-mail address. We'll send you an e-mail with instructions to reset your password.