Answered

Stacking Custom Cards


Userlevel 1

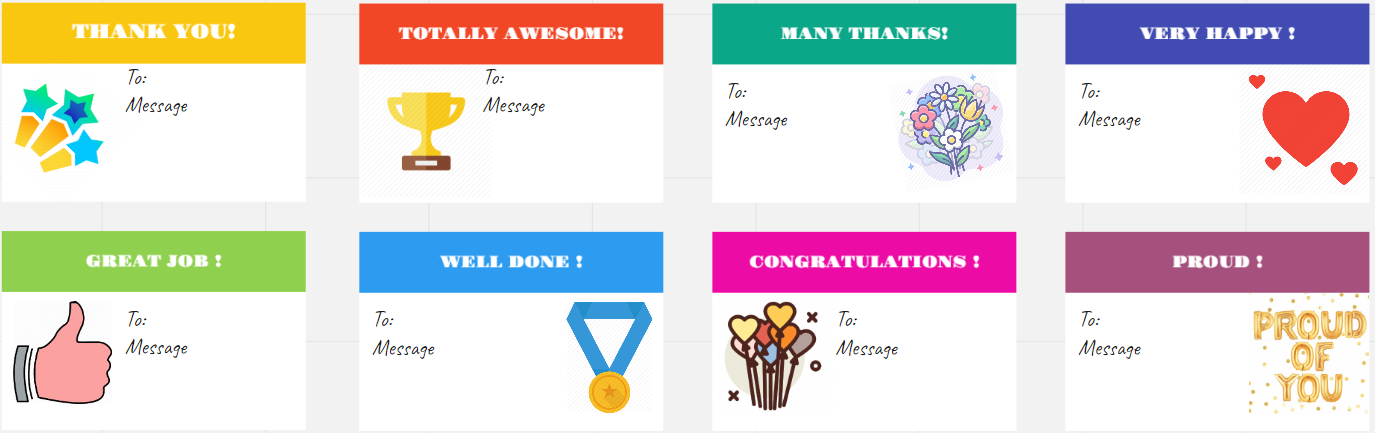
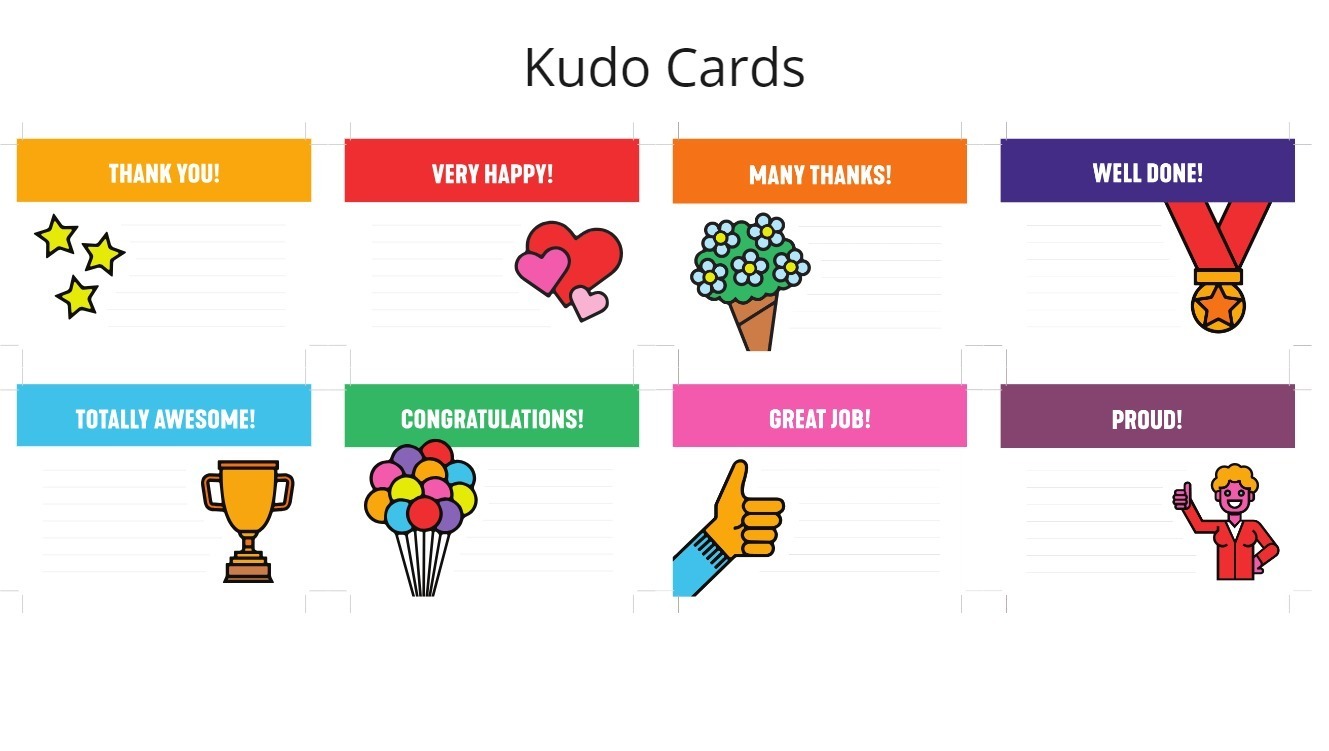
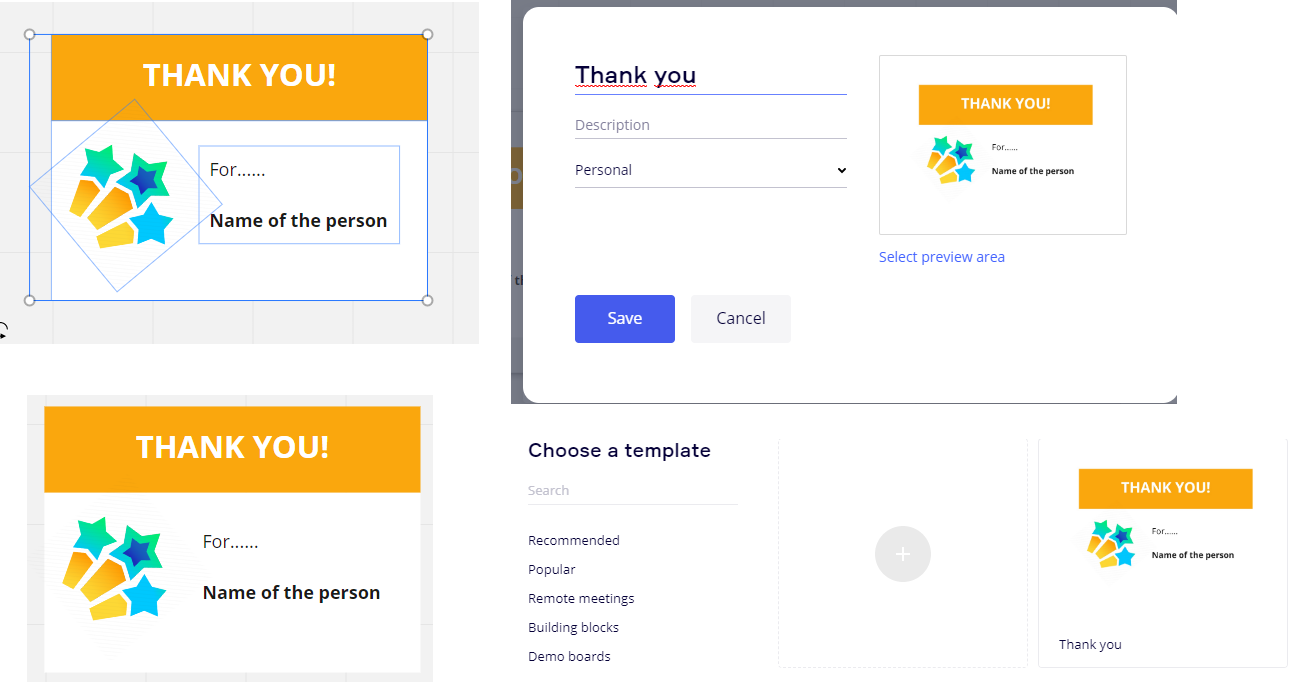
I have a requirement and trying to find if this is possible or not.

I have custom designed cards. while providing training i want those cards to be available to my clients as a stack, so that during a collaboration session anyone can use them multiple times.

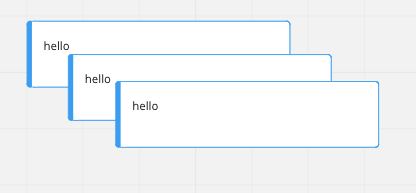
Just like the Stack of Sticky notes i want my custom cards to be available as a stack.

Is there a possiblity of doing so.

icon

Best answer by mlanders 30 April 2020, 23:17

View original

15 replies

Userlevel 7
Badge +4

I am not sure if I fully understand your question. Are you referring to the Card feature in Miro?

If so, it's  yes, you can stack them up as per image below. You can also group them and create multiple duplicates.


A stack of Cards


Userlevel 1

What Actually i was looking for is.  as shown in below image  I have these images,  While giving trainings i want my students to use the background and write the text.


just select the template write your comment mentioning the fellow student


Userlevel 7
Badge +9

Hi,

it seems to me that you’ve got your solution.

Till now you’ve got graphics that you can slice as a single background save this as templates with a textfield in it.

Of course you can create a template which is created with single elements of miro elements

Can you describe in detail what you want to do and what the difference is as if you’re going to use your graphical backgroundpicture?

Michael

Userlevel 6
Badge +1

@mlanders that template looks amazing!

Userlevel 1

Looks Promising @mlanders Will try 

Userlevel 7
Badge +9

Hi @Kyle.C and @Study Agile ,


thank you for your kind words

it is real simple:

  • Add a rectangle shape
  • Use the colour picker to get the same colour that you have on your graphic
  • Fill in the words
  • Use a second rectangle shape in white for the rectangle where you add your text and place it directly under the first coloured rectangle
  • Use the iconfinder to find a icon which fits for your needs (in my case stars)
  • Place it into the right place on the left, rotate it a bit
  • Add a text-field and give in the words 

    “For......

    Name of the person”

  • Format the Name of the person Bold

  • Select everything
  • click on the 3 points on the right with the right mousebutton
  • Select “Create Frame”
  • Name it
  • Select the frame
  • click on the 3 buttons and choose “Save as Template”

You’re done.

Now the real fun begins because you only change colours of the top rectangle shape and the icon and then you save it as template.

Michael

Userlevel 1

Thank you @mlanders  Figured it out and prepared 2 cards


Userlevel 1


Userlevel 7
Badge +9

Hi @Study Agile ,


Wow - they are looking awsome :ok_hand::thumbsup::clap: - I’m impressed!!! 

One question:

Could I use the idea / part of your graphics (in the same way I created the example) to create my own templates?

The idea behind the graphics are really great!!

Michael

Userlevel 7
Badge +9

@Study Agile ,

I run out of words:

Thank you …

My message was in preparation just when your message here was posted.


Thank you again!!!

Michael

Userlevel 1

@mlanders Sure you can use them.  The only problem with the icons is there are gray lines across the image which is spoiling the image appearance 

Userlevel 1

Done Preparing the Templates. MIRO is

Awesome


@mlanders can we share these templates across the Community if required? does miro support this?

Userlevel 7
Badge +5

Hi all,

The templates are awesome :heart_eyes:

We are working on the solution which will allow you to share your templates with the community (a sneak peek is here 🤫). Stay tuned!


Btw, here is a discussion about shared templates as well.

Userlevel 7
Badge +6

These templates look really amazing! Great work @Study Agile and @mlanders !

Userlevel 7
Badge +9

Hi @Study Agile,

on the site:

http://www.iconarchive.com/

you can find free downloadable icons and when you search for a svg icons

you can drag them into your board and the quality is excellent in every size.

Michael

Reply