Hi everyone - I’m new to Miro so was wondering if this use case is supported, or if you could help me understand the best way to do it.
I teach dyslexic students online and they can’t hold attention to more than just one page at a time. So I only expose them to one page, let them work online with me on it, and then expose them to the next page. If I go to the previous page, their work is still saved on there (scribbles, drawings etc..).
I have a Team account and am new to Miro. I don’t see an option for pagination where there is only one page at a time in front of the viewer where we can collaborate together. The closest I came to was uploading a power point presentation where it did allow me to navigate the deck slide by slide, but the student’s scribbles and work did not associate themselves with each slide in the deck. So if move from Slide 2 to Slide 3, the scribbles the student made on Slide 2 were still visible on Slide 3. I explored Frames but didn’t see how I could do this quickly if I have a slide deck to work with. I would have to manually make a frame out of every single slide?
So my question is - is there a way in MIRO for me to upload a slide deck or a PDF that has pages , expose only one page at a time, have my student work on it, then move to the next page while still saving the collaboration on the previous page?
Thanks in advance.
Page 1 / 1
@Grace Sharma - My first thought would be to use Frames.
You can then hide frames and only show them when you’re ready to work on what’s inside the hidden frame. Once you’re done with the frame, hide it again and move on to the next. Only the board owner (you) will be able to show/unhide the frame.
And you can open the Frames side-panel as a way to navigate from one frame to the next.
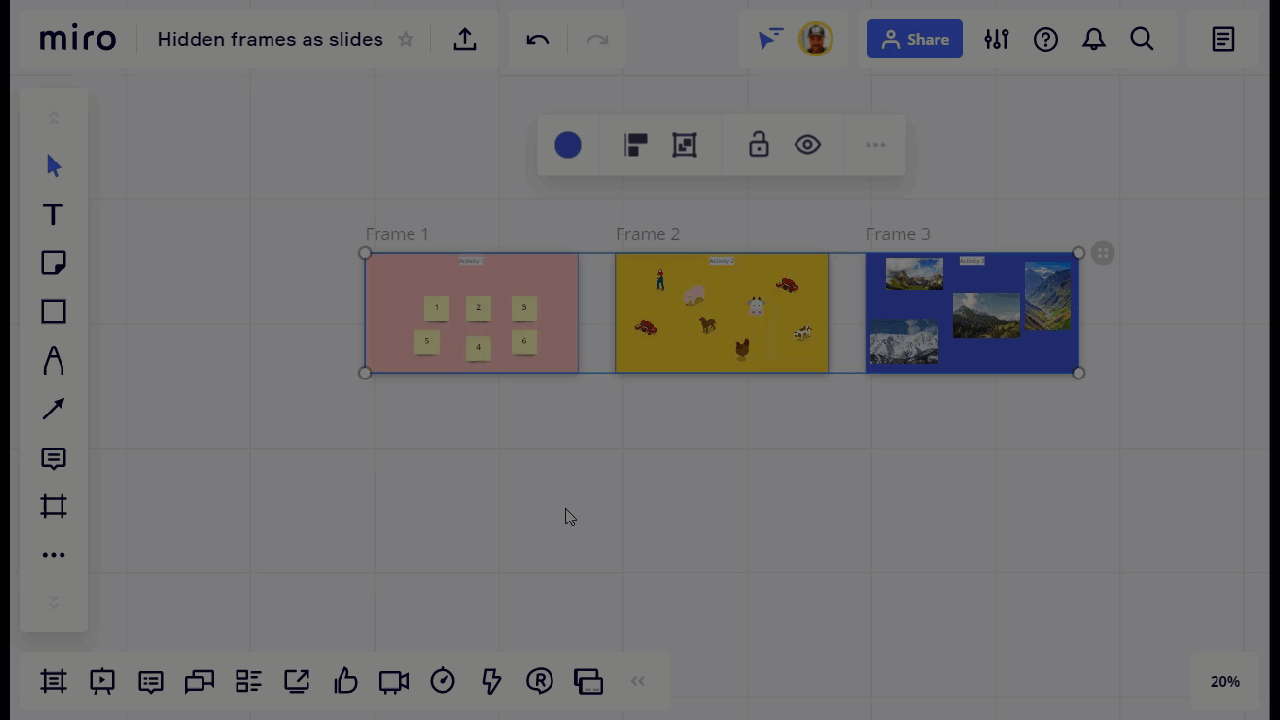
Example: Here I am hiding/showing three frames:
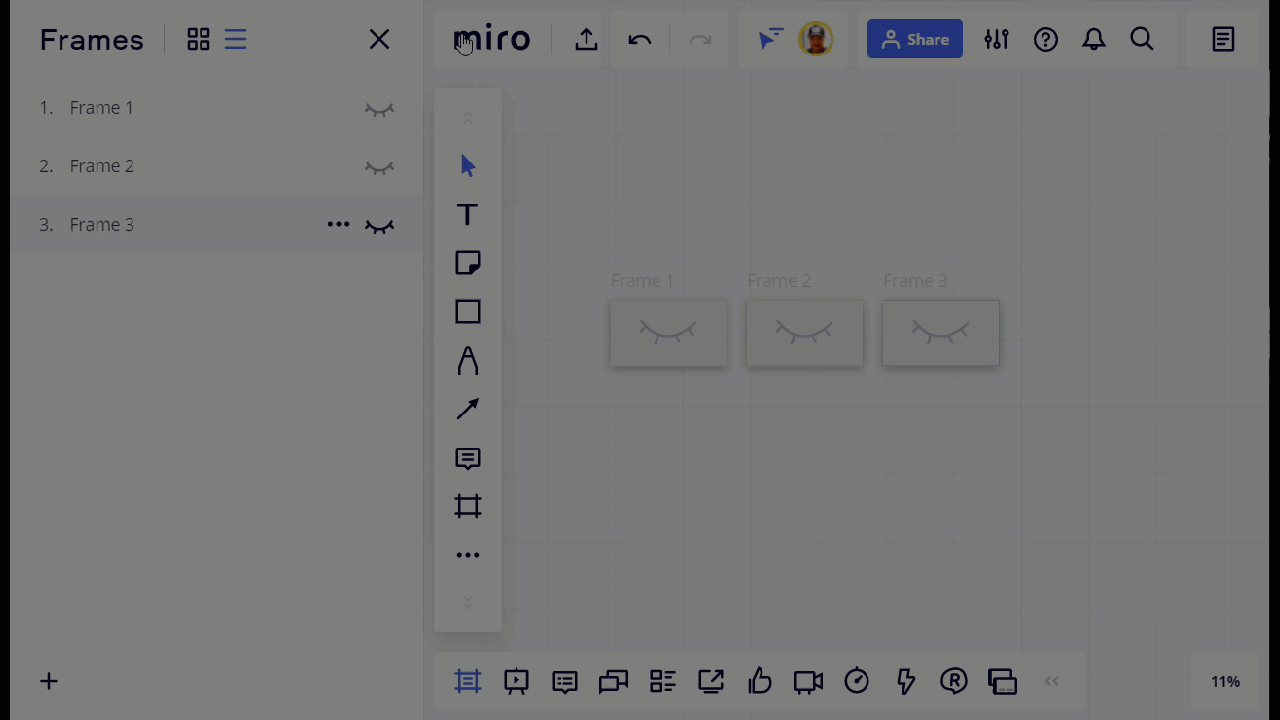
Next, I will open the frames panel and navigate to the frame by clicking on the frame name (note: your student will not see the frames panel open on the Miro board, but will see it happen if you are sharing your screen over video conferencing, e.g., Zoom):
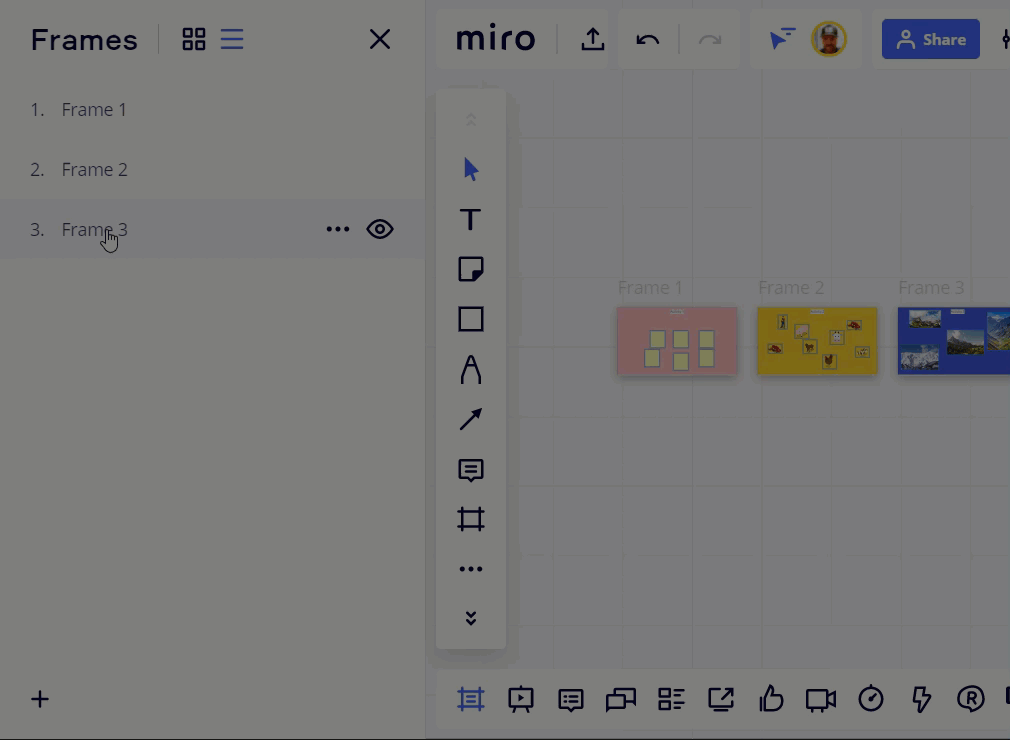
And from the frames panel I can show/hide frames:
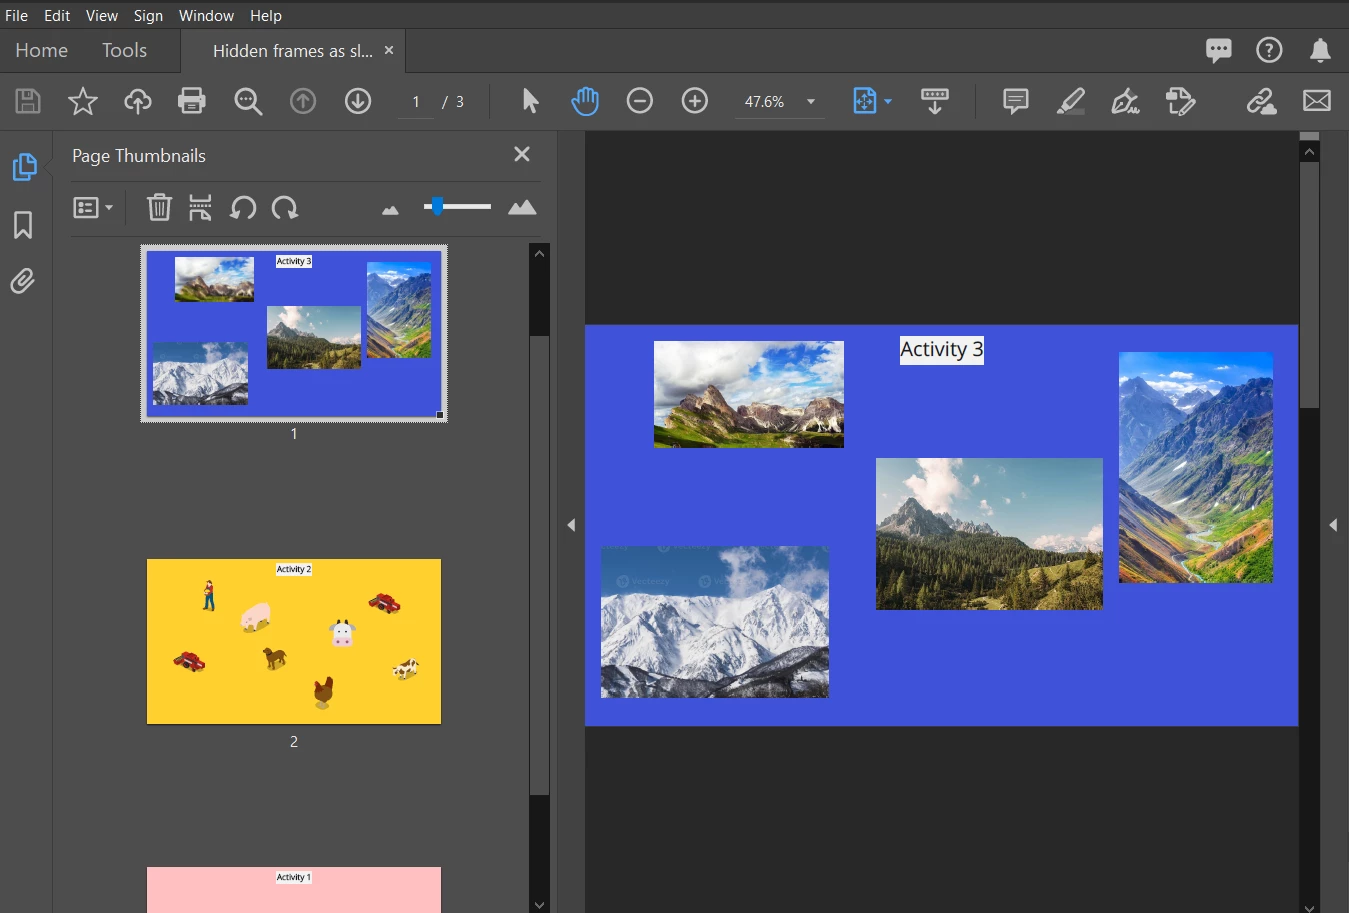
Another benefit of using frames here, is that you can export the frames to PDF - the order they appear in the frames panel will determine the page order in the PDF, e.g., I will order the frames as 3, 2, 1 and then use the export this board → Save as PDF feature:
And here’s what the exported PDF looks like (see attached) - note the order matches the frames panel order:
One final note on Saving: Every action taken on the board, by all participants, is immediately saved.
Let us know if you have any further questions!
@Robert Johnson - Thank you for your reply!
Frames does come close to only sharing one piece of information at a time, collaborating on it, and then moving onto the next one. A couple of questions which I hope you can provide some guidance on:
When I upload a PDF or a PPT - is there an easy way in Miro to say, take each of these pages and make a frame out of each one? Otherwise, I have to take each slide and manually put a frame around it.
If I am collaborating with a student on a frame, they are not just a viewer, they’re also a collaborator on that board. Would that mean they would see the hidden frames as well? Or they won’t because I am the one who marked them hidden?
Many thanks!
Grace
@Grace Sharma - You're welcome!
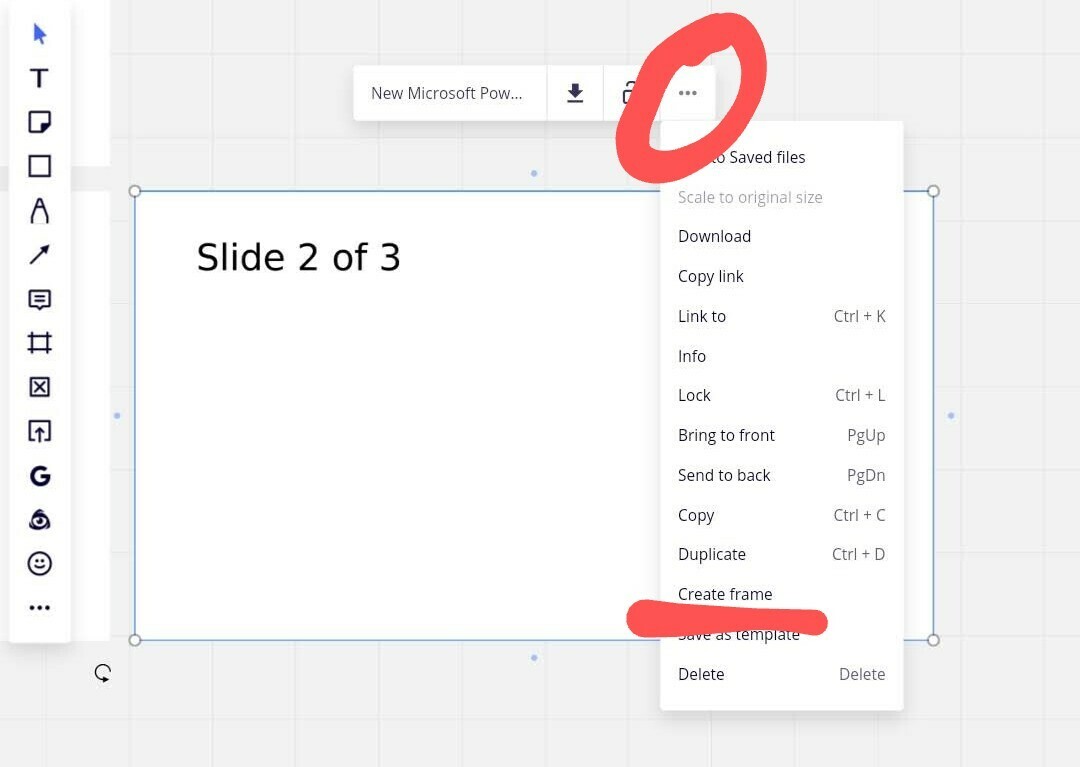
Unfortunately there is no quick way to select all of the extracted PowerPoint or PDF extracted pages (or any group of objects) and put frames around them. You will have to do this manually. There is one handy action to help, though. You can select an object and use the Create frame action from its context menu:
All participants will always see everything on the board as there is currently no feature to have private objects. Therefore, your students will see the frames just as you are seeing them, e.g., the hidden state:
Thanks @Robert Johnson - indeed the best way I have come across is to expand all the slides, make each one a frame (manually is the only option) , hide all of them so the student doesn’t randomly browse around in a distracted fashion, and then “reveal” one frame at a time to the student.
The problem with selecting the slide deck object and making it a frame is that it makes that entire object one frame. That operation doesn’t split each slide into its own frame. So I’ll have to do it manually.
In any case, I think I have the answer I need and I thank you for this information.